
![]()
![]()
![]()
![]()
![]()
![]()
![]()
![]()
![]()
![]()
![]()
![]()
![]()
![]()
![]()
![]()
![]()
![]()
![]()
![]()
![]()
![]()
![]()
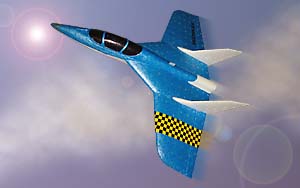
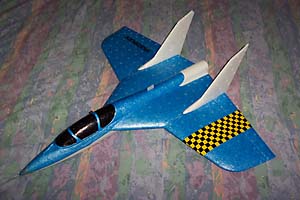
| Multiplex Micro Jet....... With A Difference! |
 This
model has been around for a few years now, and like most of the Multiplex
range of "foamie" models…..has a big following here in the
UK.
This
model has been around for a few years now, and like most of the Multiplex
range of "foamie" models…..has a big following here in the
UK.
By all intentions, I was going to fly this model as it was designed to be, as an electric powered model. I first saw one fly at the 2003 Model Symposium held at Sandown, and was immediately impressed by its performance. At the Weston Park show in the same year, I saw the model going fairly cheaply on one stall, and decided to buy one!
So
What Do You Get?
Err………well
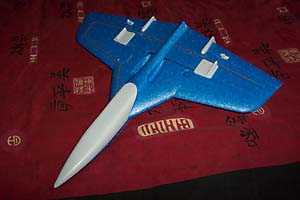
not a lot really !. All the main airframe parts are moulded from "Epilor",
with the main fuselage and wings being moulded as one single unit. The
fins, decking and canopy are all separate mouldings, the fins being moulded
in white rather than blue, like the rest of the model. A thin underpan
(to strengthen the nose area), servo covers, motor mount and motor cover
are made from ABS plastic. Plastic horns and steel pushrods are included,
as is the "Speed 400" type motor.
I won't bore you with a detailed guide to building this model, as the kit supplied instructions do that perfectly. Instead, I will give you an account of the mods I carried out to turn this model into a potential slope soarer !.
 Lets
get cracking!
Lets
get cracking!
Firstly,
R/C gear selection is paramount, as the instructions suggest using Multiplex
MS-X2 servos. Most good Multiplex stockists should have these in stock,
but as an alternative to these, a pair of Perkins "Naro" servos
will fit perfectly too (They share the same case and mechanics as the
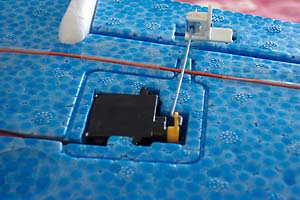
MS-X2 !!). I decided to fit a pair of Ripmax SD150's instead. A very small
amount of foam needs to be removed, to make these servos fit into the
pre-moulded servo wells (see photo below). The Receiver used on this model
is a Multiplex Pico 4/5, and power comes from a 650mAh Ni-Mh "AA"
flat battery pack, supplied by Multicell
The adhesive recommended in the instructions, is superglue used in conjunction with an accelerator (kicker). Personally, I used GRIP standard 'thin' superglue without kicker for the whole construction phase.
The first parts to be glued on where the ABS underpan, and then the two fins. The ABS motor mount and motor cover were trimmed to size, and also superglued into place. Once those had all had time to dry off (I left it all for 24 hours), attention was turned to fitting the servo leads.
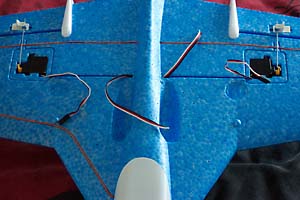
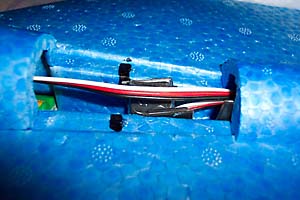
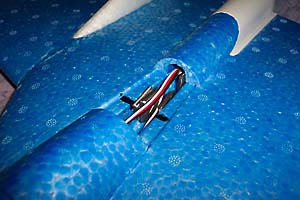
Holes
need to be made from the underside of each wing, into the radio compartment,
as per instructions. The plugs need to be cut off the servo leads, and
extension leads need to be soldered on instead. Make sure you insulate
the leads with heatshrink tubing first !. (See 'before' and 'after' photos
below).
 |
 |
Also needed, is a small hole for the aerial wire to exit from the radio compartment. This again, is best done from underneath the model, into the radio bay. A small hole needs to be made so that the aerial can go through the rear fuz, with the aerial itself held in place with "Diamond Tape".
With all the wiring sorted, and checks made on the servos…its time to mount them solidly in the model. A few dabs of superglue were used to hold the servos in place. This method was also used to secure the two servo covers. With all wires pressed into their pre-moulded recesses, they were covered with "Diamond Tape".
With the model basically finished now, she was starting to look the part, apart from the missing motor !. It may be a good idea to build the model with the motor installed, as this gives you the option of flying it as a powered model at a later date.
Here
Comes The Difference!
As I'm building this model for slope soaring…..the motor will not
be needed. The top decking was cut into three pieces, two pieces being
fixed in place, whilst the other is used as a hatch, so that extra ballast
can be fitted inside the model, as to help with flight in stronger conditions.
(See photos below).
Careful
use of the scalpel is needed as Epilor cuts very easily. A few gentle
strokes will see the sections of the top decking fall apart. On the removable
'hatch' section, a small cut was made, and a spare Mylar hinge was inserted
and glued into place, to act as a handle.
 |
 |
…….and so to the finished model below (without the stickers fitted yet).
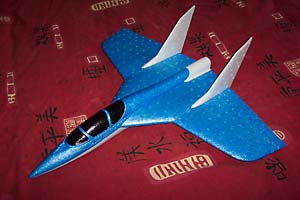 |
 |
And with a couple of stickers fitted, noting the Mylar 'handle'.
Trimming
& Flying
With
the radio set up, 3mm of up (reflex) was set into the elevators. I didn't
go with manufacturers recommended throws, and just set what I felt looked
right! With everything looking fine and dandy, she was put on charge for
12 hours, to await her test day.
To be honest, I didn't expect too much from this model as it's not designed to fly as a slope soarer. The maiden flight took place at Burrough Hill on the 9th of January 2005. The wind was blowing roughly 20mph+, from the SW.
The first flight lasted about a minute or two, as the model was still slightly nose heavy. Performance even on the first flight was far better than I first thought it would be! On landing, the rear balance weight was moved further back into the fuz, and she was launched off again. This time, she sat better in the air, and needed no "up" to be held in. At lower speeds she does tend to try and flick, but what model doesn't?
In no time at all, she was zipping across the slope like a true slope machine. Even with its light, all-up weight. This model is surprisingly fast in quite strong winds, and was even happy to catch some lift! Due to the conditions and limited height gain, I didn't try looping her. Confidence was high enough, to try a couple of rolls at low level. These were found to be very axial and very fast!
It has to be remembered that this kind of model is designed to fly in light conditions, with a motor strapped to it. The foam isn't really up to the job of slope soaring, as it's a bit too soft and won't take sustained abuse. Plan your landing and she'll sit down a treat. Bring her in rough, and you 'WILL' break her!
In level flight, she is very well balanced, and is surprisingly stable. Get some height and put the nose down, and she picks up speed and holds it!
I do recommend that you should try sloping this model, as she's great fun…and it makes a change to see a different shape in the sky!
Settings:
Elevator:
7mm both ways.
Ailerons: 12mm both ways.
Reflex: 3mm up.
C/G: As per instructions.
Weight: (as flown by me, with ballast):- 11 1/8 oz / 317g.
Ballast: 30 to 40g, on the C/G point.
| Technical Details - Micro Jet | |
| UK Distributor | All Multiplex Stockists |
| Aircraft Type: | Highly manoeuvrable electric/slope aerobat |
| RRP | Around £40 |
| Number of Channels: | 4 Channel Radio |
| Control Functions: | Elevons (2 servos in wing mixed) |
| Construction | Epilor Foam |
| Likes | Dislikes |
|
|
| Info Panel |
|
Micro
Jet
Available from all Multiplex stockists |
| Comments: I love it !!!!! |
| Price: Around £40 |
| See Technical Details Below |