
| Part 2 - First Circuits |
 Before
we get into the flying, set your lower pitch to about minus 2 degrees with
5 to 6 degrees in the hover position and 8 to 9 degrees at the top. It is
also useful to set up the radio so that the throttle trim gives you tick
over in the middle, idle up at the top and engine cut at the bottom. You
should be able to achieve this using the travel adjustment (not the throttle
curve) on the transmitter, if not you will have to adjust the throttle servo
arm as required. You should now fly the model with the throttle trim at
the high position; this will keep the engine revs up when in negative pitch
there-by giving more control. As with learning the hover it is a good idea
at this stage to get an experienced pilot to fly the model and adjust the
trims as required, this will make it much easier for you.
Before
we get into the flying, set your lower pitch to about minus 2 degrees with
5 to 6 degrees in the hover position and 8 to 9 degrees at the top. It is
also useful to set up the radio so that the throttle trim gives you tick
over in the middle, idle up at the top and engine cut at the bottom. You
should be able to achieve this using the travel adjustment (not the throttle
curve) on the transmitter, if not you will have to adjust the throttle servo
arm as required. You should now fly the model with the throttle trim at
the high position; this will keep the engine revs up when in negative pitch
there-by giving more control. As with learning the hover it is a good idea
at this stage to get an experienced pilot to fly the model and adjust the
trims as required, this will make it much easier for you.
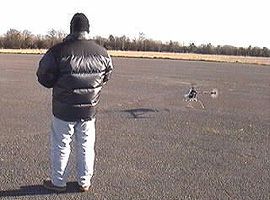
Start with the model tail in, facing into wind, at a height that you are happy with, then hover over to your left side, back to the middle and then to the right side, keep practising this with the tail in then gradually turn the tail to follow the direction of the model and without stopping in the middle. The turns are initiated by applying lateral cyclic (aileron) to produce a bank, together with tail rotor (rudder) to make the tail follow the turn. The amount of aileron and rudder applied will vary according to the forward speed of the model and whether you are turning upwind or downwind. With practise this will eventually become a figure eight with the turns at both ends away from you and at the same height all the way round.
 Do
not be tempted to fly the model in a circuit around yourself; this is
bad practise as most flying sites will not permit you to do this, so all
flying should be in front of the pilot and anyway, you will not learn
much from this as the model is in the same situation relative to you,
all the way around.
Do
not be tempted to fly the model in a circuit around yourself; this is
bad practise as most flying sites will not permit you to do this, so all
flying should be in front of the pilot and anyway, you will not learn
much from this as the model is in the same situation relative to you,
all the way around.
Some pilots find the transition from forward flight to the hover quite difficult and avoid this manoeuvre by stopping the model at height and lowering the model vertically to land. This looks very untidy and if you are ever going to fly in a scale like manor you will have to approach at 45 degrees, you will also need to be able to do this to learn autorotations.
To return the model to hover from forward flight reduce power and apply back cyclic, adjust the amount of each control to achieve a 45 degree approach. Ideally the approach should be into wind but make sure you practise from the left and right to avoid getting handed.
 As
you gain confidence with flying circuits try to gradually make them higher
and faster. The height will be useful later when you attempt new manoeuvres,
giving you more time to correct a mistake before the ground comes up!
Also don't be afraid to fly on a windy day, I have seen many pilots build
up a fear of the wind and you can't let the weather stop you flying, particularly
if you live in the UK.
As
you gain confidence with flying circuits try to gradually make them higher
and faster. The height will be useful later when you attempt new manoeuvres,
giving you more time to correct a mistake before the ground comes up!
Also don't be afraid to fly on a windy day, I have seen many pilots build
up a fear of the wind and you can't let the weather stop you flying, particularly
if you live in the UK.
Remember, the only way to learn is stick time and lots of it.
Part
3 will be on autorotations.
This page has been contributed by Jeff
Barrington
Web Site:
Newton Abbot Heli Club